
How-To Make Your At-Home Manicure Last Long

We are currently in the age of at-home manicures since everyone is staying home so much and not getting many manicures! I have been giving myself so many manicures and, while doing my nails at home, I have found the perfect way to get an at-home manicure to last longer! There are a few tricks that are crucial for a long-lasting at-home manicure and, once you try them out, you will be back here thanking me!
Step #1: Hydrate Your Cuticles & Hands.
The first step is making sure you are keeping your hands and cuticles hydrated. If your cuticles get dry, they will then peels and, that in turn can ruin your manicure, especially if you pick at it! I am 100% a picker, so to avoid this, I ensure I always have a cuticle serum available when I am doing my nails and put hand cream on by my bed, on my desk, and in my handbag!
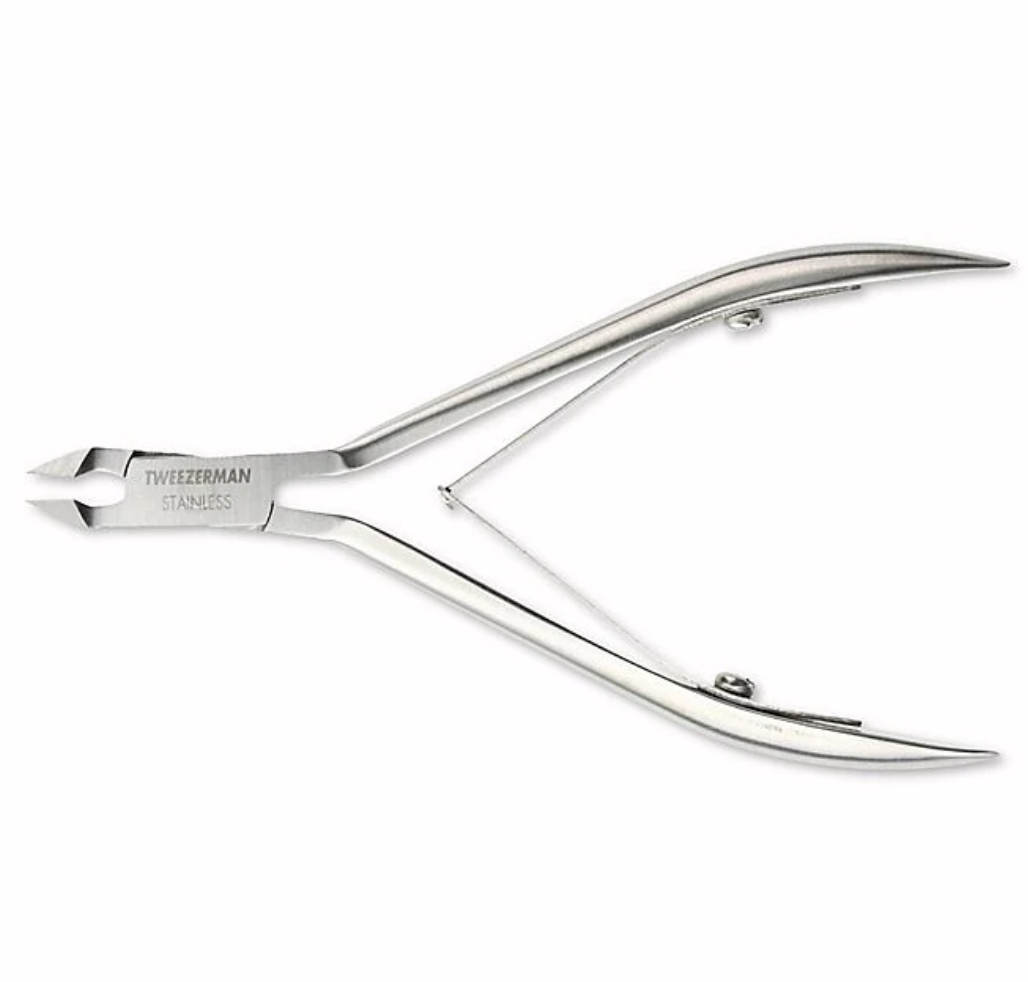
Step #2 Remove Cuticles.
Next, it is super important to remove your cuticles! I personally like to cut mine but, if you do not want to cut them (I know a lot of people don’t like to), start by washing your hands to soften them up and go over them with a nail file. That helps remove them without cutting! If you do not want to remove them, get a wooden stick, and push them back! For those of you who like to cut your cuticles, these are amazing cuticle scissors and, they do not nick the skin! Removing your cuticles or pushing them back allows for your nail polish to not get stuck on your cuticles which, will eventually lead to chipping and peeling.
Step #3: File & Buff Nails.
Next it is so important to file and buff your nails, which seems obvious but a lot of people skip the buffing step and it is one of the most important ones! Make sure to shape your nails and file down any areas that are peeling & chipping. The you will need a buffing block (get one that is medium or course) and buff the tops of your nails, ensuring your go over all the edges. Make sure to only buff sideways not up and down on the nail, you want to avoid any bits of the nail sticking up.
Step #4: Clean Off Nail Surface.
After all the buffing, filing, and cuticle serum or hand cream you, will need to remove any oil and dust on your nails. The best way to do that is to get a cotton pad (one that does not have a ton of fluff on it) and nail polish remover! Once you go over all your nails with the nail polish remover, you will be ready to paint!

Photo: Olive & June
Step #5: Thin Layers.
Next is such an important step; apply thin layers of nail polish! This step prevents the nail polish from chipping & bubbling. I generally like to wait 1-2 minutes between each coat and, that allows the polish to set up between coats. Thin coats also help the polish to go on more evenly and, if you need a 3rd coat, you can apply one for those more sheer polish colors! Before moving onto the topcoat, allow the polishes to dry which, usually only takes about 2-3 minutes since you did thin coats. Some of my favorite polish brands for a long-lasting manicure can be found here.

Photo courtesy of Olive & June
Step #6: An Amazing Topcoat.
There is literally only one topcoat I will recommend for a long-lasting at-home manicure and, that is the topcoat from Olive & June! There is no better conventional or non-toxic topcoat out there. It can make your manicure last up to 2 weeks and, it has even made some of my manicures last longer than that! It is super shiny and gives your nails a gel look to them! It also dries crazy fast which, is an amazing bonus!

Photo Courtesy of Olive & June
After you follow all these steps, you will have a beautiful, long-lasting manicure! There is nothing better than an amazing manicure that you saved money on because you did it yourself.